About my Blog

Like Food? Then you are in the right place. I love food. I love to see it, smell it, and taste it. I like to try to make it too. This my kitchen and my cooking. It's not always perfect, but it's made with love. Take a peek and try some out. Welcome to The Tiny Kitchen That Could

Showing posts with label Bite Size. Show all posts

Saturday, April 7, 2012

The Birthday Cupcakes

Christopher turned three a few days ago, and he helped me make cupcakes that he brought to school to share with all his classmates and teacher, Miss Tina, who happens to share the same birthday as him!

He told me he wanted to make a chocolate cake with yellow frosting. So I got all the stuff and he helped me out. We went ahead and made a box mix this time, but I always add a box of pudding in the same flavor to make it moist and so much more delicious. The frosting, however, is all mine! I have played around with frostings for a while and finally came up with my own, and I like it better than all the others. Get this; no shortening. Not to say it isn't, uhhh, high in that word, but it's better than the cup of shortening most frostings call for.


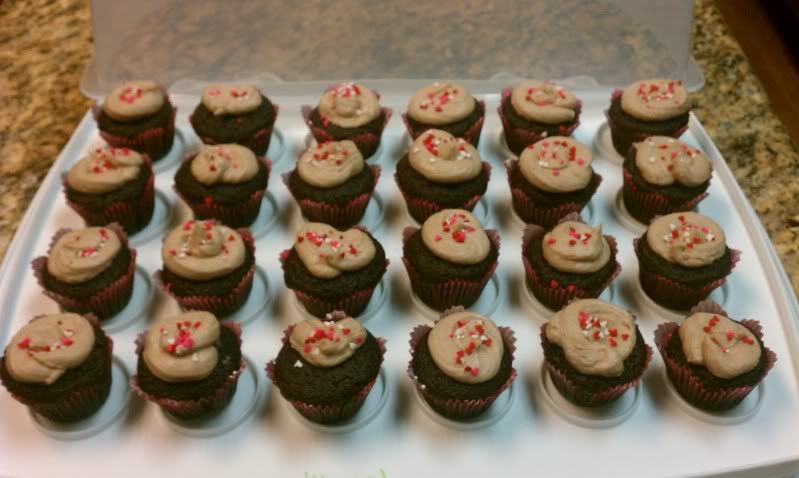
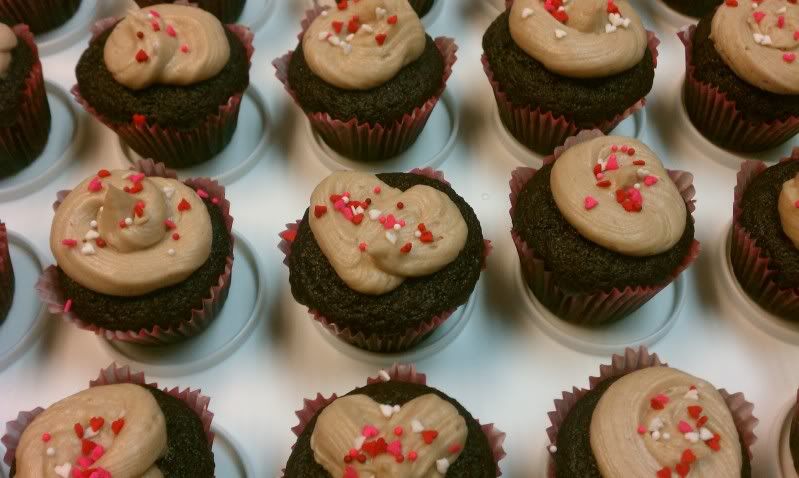
As I hope you can understand, I did not take pictures of the ENTIRE process. Silly me, I was distracted by my now three year old. So I am going to post a picture of the finished cupcakes I made for Valentines day. They are the exact same recipe, but the frosting was a different color.

The recipe for the frosting is at the bottom! Enjoy!


Ok, now just imagine these with a sunny yellow frosting!


OK, here is how that frosting is made:

You need
  • 2 sticks of butter, room temp
  • bag of powdered sugar (2lbs, but I didn't need the whole bag)
  • vanilla
  • heavy whipping cream

  1. Mix the butter with the powdered sugar, 1 cup at a time, until you get small pebble size granules.
  2. Add about a teaspoon to a teaspoon and a half of vanilla.
  3. Add the cream, a table spoon at a time, mixing thoroughly with each addition, until you get the consistency you want. (because I usually make this the might before I deliver the cupcakes, and I put on cupcakes that are probably still warmer than they should be, I like it somewhat thick, so it doesn't slid right off)
This frosting, is sweet, but not overwhelming, and it will create a nice little crust by the next day, something I love when they have to travel and little fingers are going to be the cupcake receivers.

YUM!

Friday, February 10, 2012

Light my Fire!

So it has been soooooo long since I posted a blog. I apologize, but I was so busy with boring ol' everyday life. I started a new semester of school, my husband started school, my son started full time pre-school. Not to mention we moved!

I no longer live in a teeny tiny kitchen. In fact, I feel weird for having my blog named as thus. BUT, it's to late to change that.

So before I make with the cupcake (har har), let me show off some. If you would like the story of how I got my new kitchen, just pop by at Leigh's Landing to take a peek see.

Here she is:


Gorgeous.


Okay, on to the sweets!

Valentine's Day is around the corner (really, it's in 3 1/2 days?!?).

It may or may not be the day where chocolate is not only acceptable, but required.

And strawberries may or may not be included.

My husband doesn't like chocolate (gasp), so I usually make do with getting it all to myself (like I complain about that). But on this day, I can make tons of chocolate stuff and give it away to people and not take no for an answer (teehee).

This would be a great cupcake to give to your chocolate and strawberry loving ADULT. It'll really light a fire! This recipe includes alcohol (woohoo!).

Chocolate Cupcakes with Flaming Strawberries.


I would love to say that this idea just came to me and I whipped it up by myself, but I found it on Sprinkle Bakes and her cupcakes look prettier than mine (see above). I am just a real person cooking at home.


Before I go on, here is a cut and paste quick reference and warning:


  • Any alcohol below 80 proof will not ignite well. I used 80 proof which makes a small blue flame. Note: some have had trouble getting 80 proof to ignite - lots of people are recommending Bacardi 151 as a fail-safe. 
  • You can add a little sugar to the inside of the strawberry to sweeten things up. However, the flame seems to last longer without the addition of sugar.
  • Make sure to use a liquor that you like. Vodka is a good choice if you want very little flavor.
  • Alcohol evaporates, so light the strawberry soon after you spoon the liquor in. 
  • Room temperature alcohol ignites better than refrigerated.
  • Do I have to say it? Probably not, but my conscience will not let me go without. Do not attempt to eat a flaming strawberry. It has a relatively short burn time, lasting about 30 seconds to 1 minute. So, enjoy but be careful. Use your noodle.


  • Alright, onto the fun part. The recipe is at the bottom!

    First get all your ingredients:


    And don't forget the strawberries. Cut off the tops and hollow them out, making sure there are no holes in them.


    Pre heat your oven, mix all your dry stuff in your bowl, then add the wet ingredients, and line your cupcake tray:

    Pour your batter 3/4 way full and bake them for about 15-18 minuets:


    Pipe the icing on, add sprinkles (if you wish), and put the strawberry bowl on top:

    Add the liqueur and light! I used a cheap vodka and it didn't work as well as I wanted, that stuff evaporates FAST, so next time I will put out and get the better stuff.


    Enjoy! Oh, and if you wanna share with the kiddo, just take that strawberry off!


    Cupcakes:
    3/4 cup unsweetened cocoa powder
    1 1/2 cups all purpose flour
    1 1/2 cups sugar
    1 1/2 tsp baking soda
    3/4 tsp baking powder
    3/4 tsp salt
    2 eggs
    3/4 cup hot water
    3/4 cup heavy cream
    3 tbsp canola or other vegetable oil
    2 tsp vanilla extract

    Preheat oven to 350 degrees.

    Line muffin tin with cupcake papers and set aside.

    Sift together cocoa, flour, sugar, baking soda, baking powder and salt into a large bowl. Add eggs, water, heavy cream, oil and vanilla. Mix with a hand held mixer until smooth.
    Divide batter among muffin cups, filling each half full. Bake for 20 minutes. Let cool before frosting.


    Frosting:2 sticks softened butter
    4 cups confectioners' sugar
    4 tbsp unsweetened cocoa powder, sifted
    Heavy Whipping Cream to taste.

    In the bowl of a stand mixer fitted with whisk attachment, cream together sugar, cocoa and butter; beginning on low speed then increase to high. Add cream a tablespoon at at time and beat until fluffy and lightened in color. Transfer mixture to a piping bag fitted with a decorative tip. Frost cupcakes.


    Strawberries:
    18-24 Strawberries - you'll need as many as you have cupcakes
    Vodka, rum, or your choice of liquor 80 proof or higher (use Bacardi 151 for fail-proof results).

    Hollow the strawberries carefully. If you pierce the side of the strawberry accidentally, start with a new one. Since you'll be setting the liquor aflame, it is important that the strawberry is leak-proof.

    Set one strawberry atop each frosted cupcake. Fill strawberries with liquor just before lighting (see tips). If you need to light them all at once, (say, for a party) use a turkey baster to quickly fill all the strawberries and a grill lighter in lieu of matches.

    Wednesday, December 28, 2011

    Eggnog Cream Cupcakes

    Eggnog.
    You either love it or you hate it.
    I made these for the Christmas Dinner I have with my mom and step-dad.
    My step-dad loves to try new things, he likes the Food Network channel as much I do.
    I got this recipe idea from Pinterest and it led me to Eggnog Cupcakes!

    My step-dad ate almost all of them too, I didn't even have a chance to try them.
    They are a perfect seasonal treat to make.


    Eggnog Cupcakes

    Yield: 12 standard cupcakes
    For mini cupcakes, follow directions below and bake 10-12 minutes. To make a two layer cake, double the recipe and prepare batter as directed. Grease two 8" cake pans, and bake in preheated oven for 30-35 minutes.
    Ingredients
    • 1 1/4 cup cake flour
    • 3/4 teaspoon baking powder
    • 1/4 teaspoon baking soda
    • 1/4 teaspoon salt
    • 6 tablespoons (3/4 stick) unsalted butter, room temperature
    • 3/4 cup granulated white sugar
    • 1 large egg, room temperature
    • 1 large egg yolk, room temperature
    • 1 tablespoon vegetable oil
    • 1 teaspoon pure vanilla extract
    • 1/2 cup eggnog, room temperature
    Eggnog Cream Cheese Frosting:
    • 8oz cream cheese, room temperature (not light or low fat)
    • 1/2 cup (1 stick) unsalted butter, room temperature
    • 1 teaspoon vanilla extract
    • 2 cups confectioners’ sugar (powdered sugar), sifted
    • Pinch of Ground Nutmeg
    • 1-2 tablespoons eggnog, to taste
    • 1 tablespoon Rum, to taste (optional)
    Directions
    Preheat the oven to 350 degrees F. Line a cupcake or muffin pan with 12 baking cups.
    Sift the flour, baking powder, baking soda, and salt into a medium-size bowl and set aside. Using an electric mixer, beat the butter and sugar together until light and fluffy, about 5 minutes. Scrape down the sides of the bowl. On low speed add the egg and yolk one at a time. Beat in oil and vanilla until incorporated. Gradually and add the flour mixture and eggnog, alternating between the 2, beginning and ending with the flour mixture. Do not over beat. Distribute all of the batter evenly between the 12 baking cups. Bake for 18-22 minutes, or until a toothpick inserted comes out clean. Cool the cupcakes completely on a wire rack before frosting.
    Prepare frosting. With an electric mixer, beat butter and cream cheese on medium speed until smooth (make sure they are both at room temperature so you do not get lumps in your frosting). Gradually beat in powdered sugar until incorporated. Add vanilla, a pinch of ground nutmeg, and 2 tablespoons eggnog, add more to taste. Add 1-2 tablespoons of rum if desired. Beat on medium speed for about 2 minutes, until smooth and creamy.
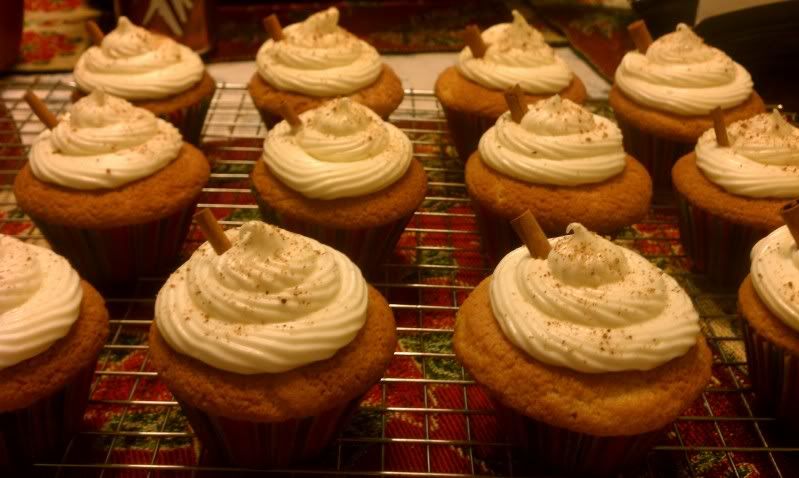
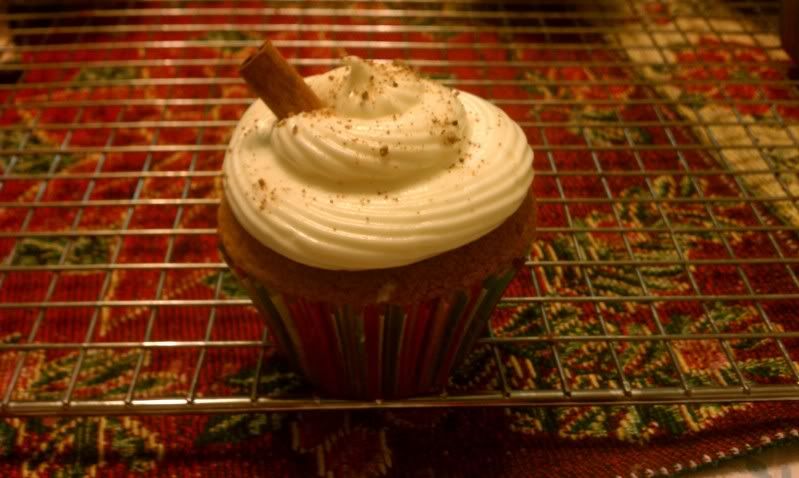
    Garnish cupcakes with a sprinkles of ground nutmeg and/or a cinnamon stick.

    Tuesday, December 6, 2011

    Andes Cupcakes

    Hello Holidays

    Yes, you heard right, I DON'T want to be skinny. I just want to eat and eat and eat.
    Cause how can I be on a diet with you around?


    Ahhh, the holidays. We have a love hate relationship.
    I mostly love it, because I can bake and people won't think I am crazy, hahaha.

    Tonight I made some of my better cupcakes.
    I hope you like Andes Mints.
    Cause there are a lot of them in here!


    Pictures first, directions on bottom!
    I got this from Your Cup of Cake via Pinterest, and what I changed was what was on the chocolate filling recipe.


    Directions!

    Chocolate Cakes:
    1 cup sour cream
    ½ cup oil
    1 teaspoon vanilla extract
    3 eggs
    ¼ cup water
    ½ cup buttermilk
    Devil’s Food Cake Mix

    Chocolate Mint Filling:
    1/3 cup chocolate chips (andes chips)
    2 tablespoons heavy cream
    ¼ cup powdered sugar


    Mint Buttercream:
    8 oz cream cheese
    ½ cup butter
    3-4 cups powdered sugar
    1 tablespoon heavy cream or milk
    1 teaspoon peppermint extract
    green food coloring


    Directions:
    1.Preheat oven to 350 degrees and line two cupcake pans with paper liners.
    2.Using a whisk, mix sour cream, oil and vanilla extract together. Add eggs one at a time, stirring well in between each addition.
    3.Alternate adding the cake mix and liquids (buttermilk and water), starting and ending with the cake mix. 4.Fill liners 2/3 full and bake for 14-18 minutes, or until and inserted knife come out clean.
    5.Chocolate Mint Filling: Melt chocolate chips and heavy cream together in the microwave or on the stovetop over medium heat. Stir in powdered sugar.
    6.When cupcake come out of the oven, use a squeeze bottle to fill the cupcake with the filling, or use the filling as a ganache and dip the tops of the cakes into it.
    7. Mint Buttercream: Beat cream cheese and butter until light and fluffy. Add powdered sugar, heavy cream and peppermint extract and beat well. Add green food coloring and stir well
    8. Pipe buttercream onto cooled cupcakes and top with extra Chocolate Mint Filling and an Andes Mint.

    Monday, November 28, 2011

    Cake Batter Treats

    It has been a awhile since I posted on this blog and for that I am sorry. I have lots of pies that I have made recently and just need to find the time to put them up here!

    But for now something super fast! I don't think this takes even an hour from start to finish.

    Rice Crispie Cake Batter Treats!

    I saw this picture on Pinterest:

    And

    I may or may not have immediately ran to the store to by a cake mix to make it.

    And…had a little too much fun playing with those gorgeous, colorful sprinkles.

    And…enjoyed every single, glorious, hint-of-cake-batter-flavored bite.

    And…shared the rest with friends so that I didn’t eat too many bites.

    And…now I share it with all of you.

    And…you should make some.

    :)


    You need:
    Ingredients:
    • 3 Tbsp. butter
    • 1 (10 oz.) bag of mini-marshmallows
    • 1/4 cup yellow cake mix (the dry cake mix, not prepared into a batter!)
    • 6 cups crispy rice cereal
    • 1 (1.75 oz.) container of sprinkles
    (I used more than 1/4 cup of cake mix (1/3), I wanted a bigger cake flavor. Just eyeball what you think.)


    And...this is what I did:


    Method:
    Melt butter in a large saucepan over low heat and add marshmallows. Stir until they begin to melt, adding in (dry) cake mix one spoonful at a time so its combined. Stir in cereal so it is completely coated with marshmallow mixture. Sprinkle in a handful of the sprinkles and mix. Press into a baking dish (any size will do) and top with remaining sprinkles. Let sit for about 30 minutes or in the fridge for about 10-15 before cutting. I find spraying a knife with nonstick spray helps to cut them.


    Viola!


    SUPER easy and fast.

    And yummy!